How to Care for and Maintain Your Designer Wear
fashion
Are you tired of burnt sugar ruining your homemade caramel? You're not alone! Making caramel can be tricky, but with the proper techniques, you can achieve sweet, luxurious results. Let's dive into how you can create perfect caramel without the fear of it burning.
What Is Caramelization and How It Works
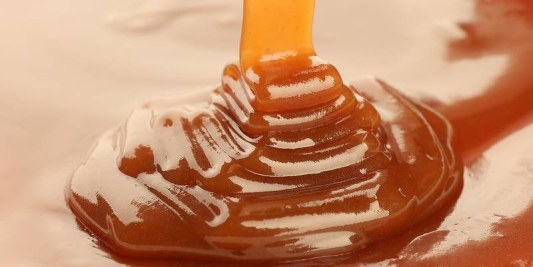
Caramelization is the fascinating transformation of sugar into a delectable caramel through the application of heat. This process is essential to achieve the rich flavors and deep color we associate with caramel. When sugar is heated, it undergoes a melting phase before it starts to develop those complex flavors and aromas that make caramel so irresistible.
The critical temperature range for effective caramelisation falls between 320°F and 350°F (160°C and 180°C). It is crucial to monitor the sugar closely during this stage; any overheating can lead to burnt sugar, which only produces bitterness and ruins the delightful sweetness you aim for. With careful attention, you can achieve that perfect golden, gooey caramel every time.
Essential Ingredients for Perfect Caramel
To make irresistible homemade caramel, you'll need to gather a few essential ingredients, each playing a significant role in the final product. First and foremost is granulated sugar, the primary component that undergoes the caramelization process. It transforms from its original white color to a lovely golden amber shade as it cooks. Next, water plays a crucial role in dissolving sugar evenly, enabling even heating and preventing unwanted crystallization.
Another vital ingredient is heavy cream; it elevates the caramel by adding a rich, velvety texture and distinct creaminess when combined with the cooked sugar. Moreover, butter enhances flavor and contributes to a luxurious mouthfeel. Finally, consider a pinch of salt to heighten the flavors, striking a perfect balance against the sweetness. To maximize the success of your caramel-making venture, ensure that all ingredients are accurately measured and prepared before you start cooking, thereby eliminating unnecessary stress and reducing the risk of missteps.
Step-by-Step Guide to Making Caramel
Setting Up for Success
1. Prepare Your Tools: Before you embark on your caramel-making journey, gather your core tools, which include a sturdy heavy-bottomed saucepan. This is crucial for even heat distribution, significantly lowering the chance of scorching the sugar. Additionally, prepare a wooden spoon or a silicone spatula to use for stirring, ensuring minimal scratching on your cookware. A candy thermometer, while optional, is highly recommended to precisely track the temperature of your sugar mixture.
2. Mix Ingredients: In your saucepan, combine sugar and water in a 2:1 ratio (for example, use 1 cup of sugar to 1/2 cup of water). Stir gently to evenly combine, avoiding splattering, which can cause sugar to crystallize on the sides of the pan. The goal is to create a uniform, smooth mixture that promotes even cooking.
The Cooking Process
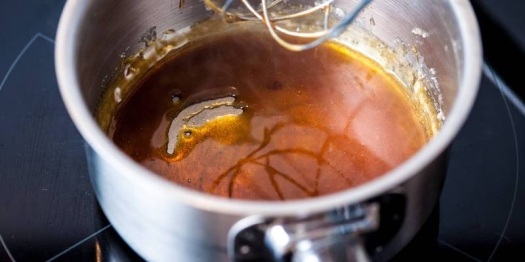
1. Cook on Low to Medium Heat: Place your pan on the stove over low to medium heat. It's essential to remain patient during this stage, allowing the sugar solution to begin bubbling gently. Avoid raising the temperature too quickly, as it can lead to uneven cooking and unintentional burning of your sugar.
2. Watch for Colour Changes: As the sugar mixture heats up, pay close attention as it changes colour—transitioning from clear to a delicate golden hue and then deepening to an amber shade. It is usually best to limit stirring during this phase; simply let the mixture cook undisturbed. If you are utilizing a candy thermometer, target a temperature of around 340°F (170°C) to achieve the ideal caramel color.
Adding Cream and Butter
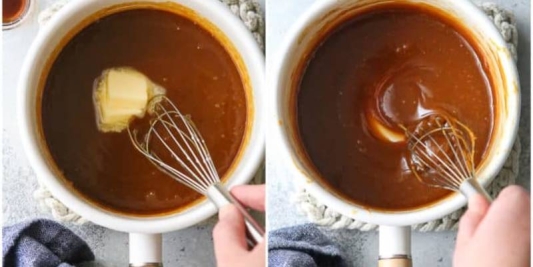
1. Remove and Cool: Upon reaching your desired amber hue, promptly remove the saucepan from heat. Gradually pour in the heavy cream and unsalted butter, being cautious of the vigorous bubbling that will occur. Stir continuously as you add the ingredients to create a homogenous mixture and achieve a smooth caramel texture.
1. Let It Cool: Allow the freshly made caramel to cool for a few minutes before transferring it to a storage container; this helps ensure that it doesn't harden too quickly and remains pourable for your uses.
Tips for Avoiding Burnt Caramel
• Use a Heavy-Bottomed Saucepan: This will prevent heat from concentrating in one area, thereby reducing the risk of sugar burning in spots.
• Monitor Heat Levels: Maintain a consistent, moderate heat. Unstable temperatures can lead to uneven caramelization.
• Stay Attentive: The cooking process requires constant vigilance, especially as the color begins to change; sugar can turn from perfect to burnt in seconds.
• Use a Candy Thermometer: For precise temperature monitoring, especially if you're a novice, this is essential to achieving your desired results.
• Have a Backup Plan: If your caramel turns out too dark or slightly burnt, you can always use the burnt sugar creatively in desserts to impart a unique flavor.
How to Store and Use Homemade Caramel
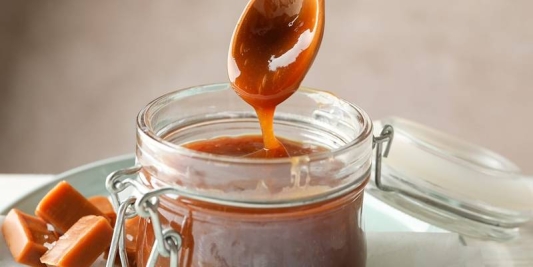
After preparing your caramel, store it properly by pouring it into an airtight container while still warm. Once it reaches room temperature, seal the container and place it in the refrigerator, where it will stay fresh for up to two weeks. If your caramel hardens, simply reheat it gently in the microwave or over low heat on the stovetop, stirring as needed.
This delectable homemade caramel is immensely versatile: drizzle it over ice cream sundaes, use it to fill pastries, or enjoy it as a dip for fresh fruits like apples or pears, where its sweetness complements the natural tartness of the fruit beautifully. Embrace your inner chef and experiment with the many creative ways you can incorporate caramel into your cooking!
Savor the Sweetness of Homemade Caramel
Crafting homemade caramel should be a stress-free and fulfilling culinary experience. By understanding the fundamentals of caramelization and adhering to the practical tips and techniques shared throughout this guide, you'll be well on your way to producing perfectly smooth caramel without the dreaded burnt flavor. Relish the journey of cooking, add your unique twist to each batch, and celebrate the rewards of your homemade endeavors. Be sure to share your delightful caramel creations with family and friends—after all, sweet treats are best appreciated together!